Celebrate July 4th with a 10% Independence Day discount! Use coupon code — JULY4QC2024! 🤩
-p-130x130q80.avif)

.svg)


Whether you’re creating SOPs for your team or answering FAQs for customers, you don’t have to spend hours manually (and painfully) stitching screenshots together anymore.
You can auto-generate step-by-step guides with annotated screenshots by simply recording your screen with tools like Guidde and Scribe.
But which tool is best aligned with your requirements? And which one offers all the capabilities you need?
We tested Guidde and Scribe against Floik to create this detailed review comparing all three tools. Let’s get into it.
Here’s our complete review pitting these three documentation tools against each other across seven key parameters.
With Scribe’s browser platform and desktop/mobile app, you can capture any process on your desktop and phone. Record multiple tabs or any app and Scribe will only capture the main part of your screen.
It’s important to note that Scribe’s free version only allows you to capture content inside your browser.
All screenshots are annotated with a yellow circle indicating the click mark. This circle is customizable in paid plans and you can change its color.
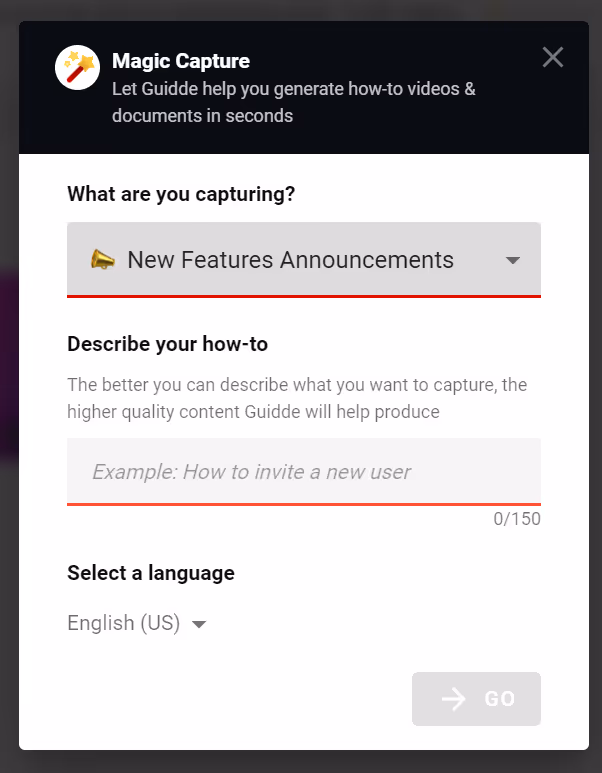
Guidde captures your screen with its browser extension and extracts screenshots from this video. As soon as you start a new recording, you’ll see this pop-up asking for specific details about a new video/guide.
This can be an unnecessary blocker if you want to dive straight into your recording.
Once the recording is finished, you’ll see a preview of the video + guide made for this process. The tool annotates each step by spotlighting the area where you clicked and pointing to it with an arrow.
On the other hand, Floik captures your browser and desktop apps for free. Each recording is saved in the video format and presented as a step-by-step guide.
In all annotated screenshots, you’ll see a flickering click mark indicating the place where you clicked with your mouse. You’ll also see an orange box highlighting exactly where users should click.

Scribe supports two outputs: guides and documents. You can generate a step-by-step guide with screenshots, GIFs, videos, etc. Apart from that, you can also create documents known as Pages.
Pages allow you to add more textual information and curate multiple Scribes in a single space. You can also embed YouTube videos and drop links for different types of content.
Guidde also produces two outputs: videos and step-by-step guides. Each guide has editable steps and you can add or delete steps quickly.
The video output is essentially a slideshow with annotated screenshots and a background. It doesn’t create an actual video from your screen recording.
But this is where Floik takes an edge over Scribe and Guidde.
With Floik, you can create step-by-step guides and convert them into self-serve demos or explainer videos—with a single click! Each video and demo are also fully customizable and you have complete control over what kind of product showcases + documentation you want to create.

Most of Scribe’s customization and content editing features are only available to paid users. So, if you just want to evaluate the tool, you won’t be able to experience all its capabilities.
In the free Scribe version, you can:
In Guidde, if you want to edit your step-by-step guides, you have to make changes in the video format. The editing interface is pretty cluttered with too much happening across your screen. Plus, it’s not the most intuitive experience to edit guides in the video format.
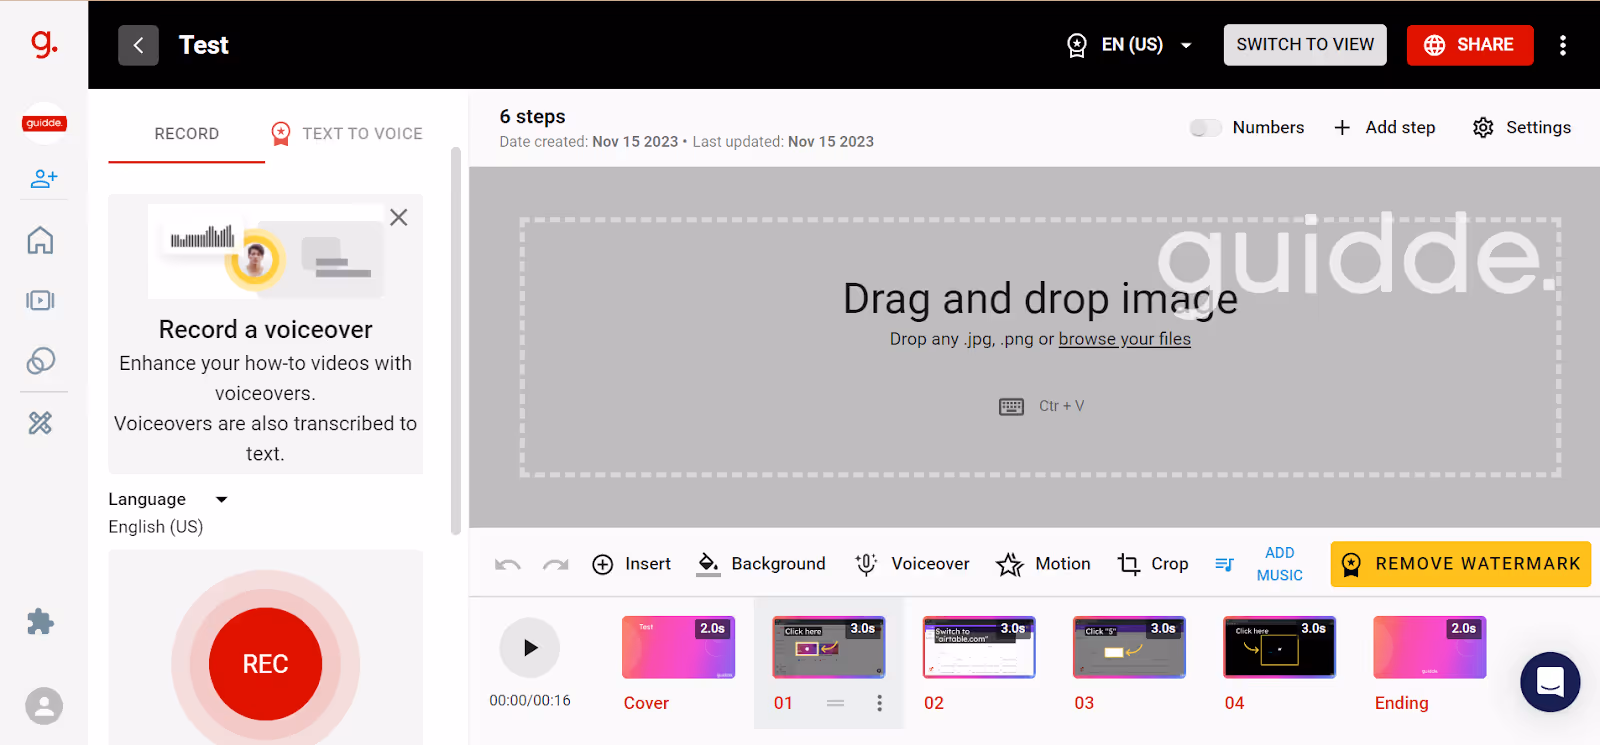
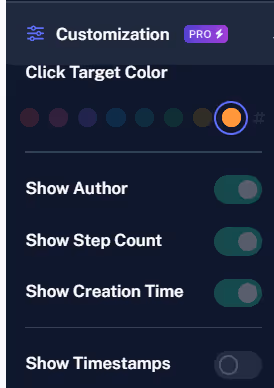
To customize your guides, you can:
But the biggest downside is that Guidde’s editor isn’t as intuitive as you’d expect. You have to individually fine-tune every little detail and there’s a lot of manual effort involved in the editing process.
On the flip side, Floik’s versatile editor makes it super easy to update your guides. You can add a new step or delete an existing one. You can also rearrange steps.
It’s easy to zoom in or out of screenshots and format the text with a rich-text editor (which is missing in Guidde). Unlike Scribe, you can blur any part of your screen and share guides with a custom-made table of contents instantly.
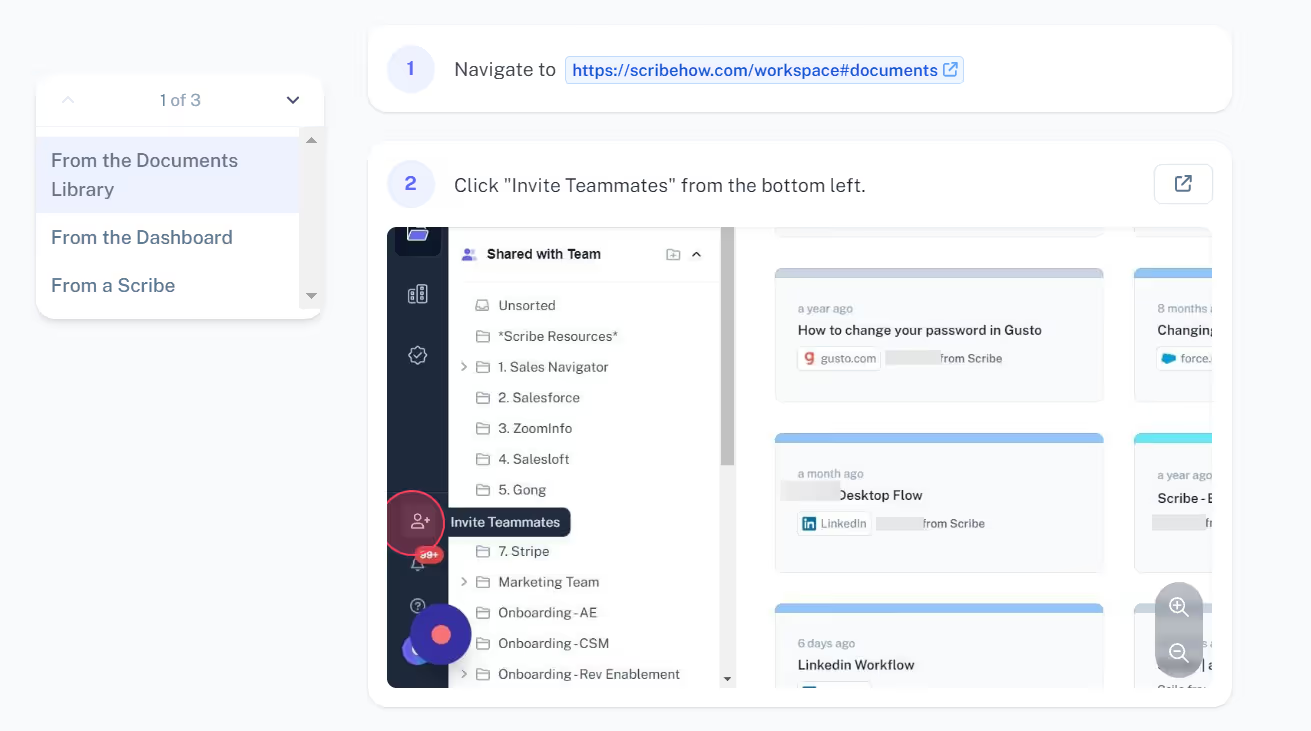
All three tools allow teams to collaborate effectively. You can invite members to your Scribe workspace and sort your documents in your shared and private space.
Creating folders is easy and you can move any folder or document across different spaces with a simple drag-and-drop function.
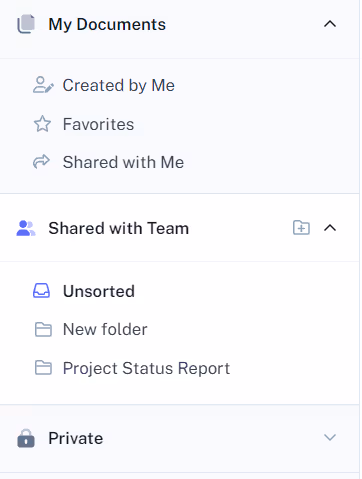
In Guidde, you can create several new team spaces with a dedicated branding. Then invite new members as owners, collaborators, or viewers. You can shuffle documents around your private and shared workspace.
With Floik, you can invite team members to view all the guides you create. All showcases will be saved under a single space while each member will have their private space.
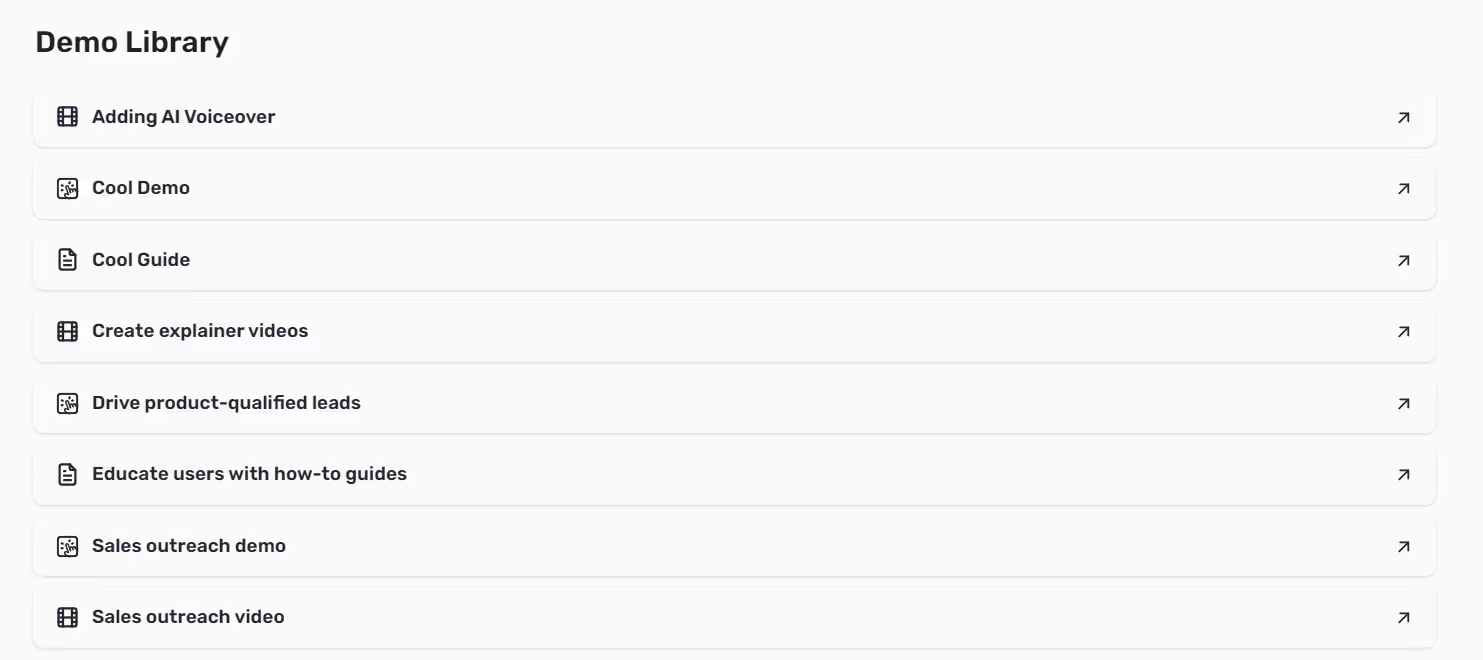
On top of moving Flos between different folders and spaces, Floik lets you publish an entire folder listing multiple Flos. This way, you can send a link to anyone with multiple resources available on a landing page.
Scribe offers smart embed codes where you can resize the embed block and create a custom code snippet. You can also grab a specific code for popular platforms like HubSpot, Zendesk, Webflow, etc. directly in the share tab.
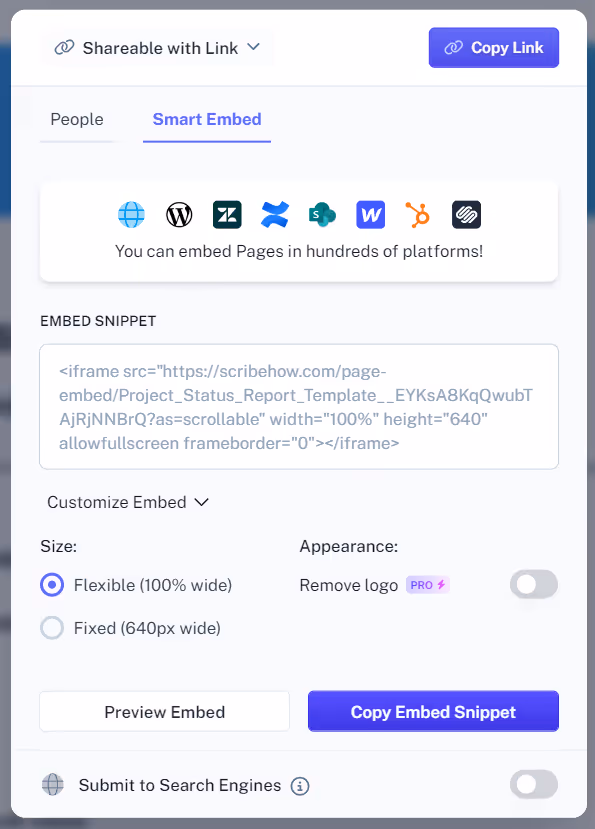
Besides that, you can share each Scribe/Page with a link or share access with the entire organization directly. There’s another option to download these guides for offline consumption.
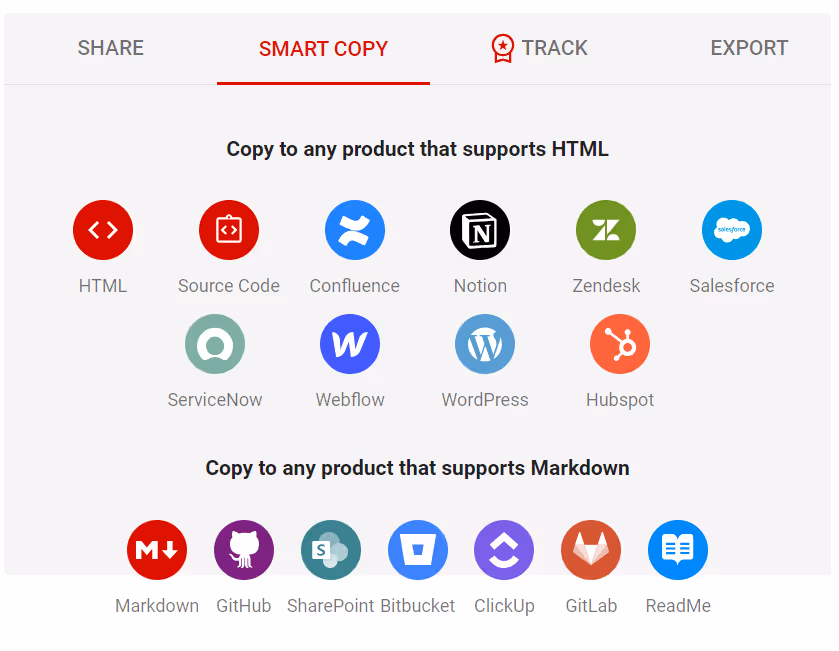
Guidde also offers similar sharing options with a smart embed snippet available for a variety of tools. You can also export your guides as GIFs, PDFs, slideshows, and videos—in the paid plans.
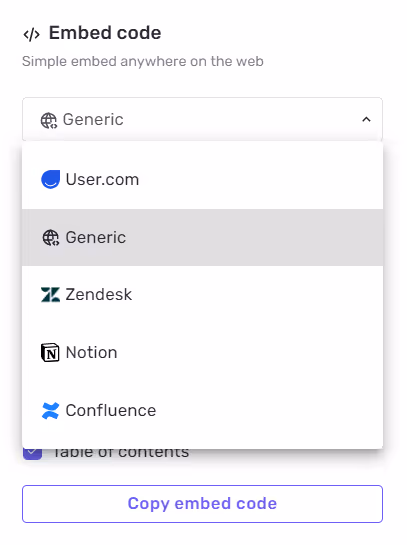
Floik makes it easy to share content with anyone. Use a public URL or copy an embed code. You can also publish a folder and share a link to the folder directly.
Scribe gives you data around the total number of views and total sessions completed for a guide. It also calculates the completion rate for these guides.
You can see some additional info here regarding the guide’s creation and last update date + who edited it the last time. This is a good way to version control your documents and track updates.

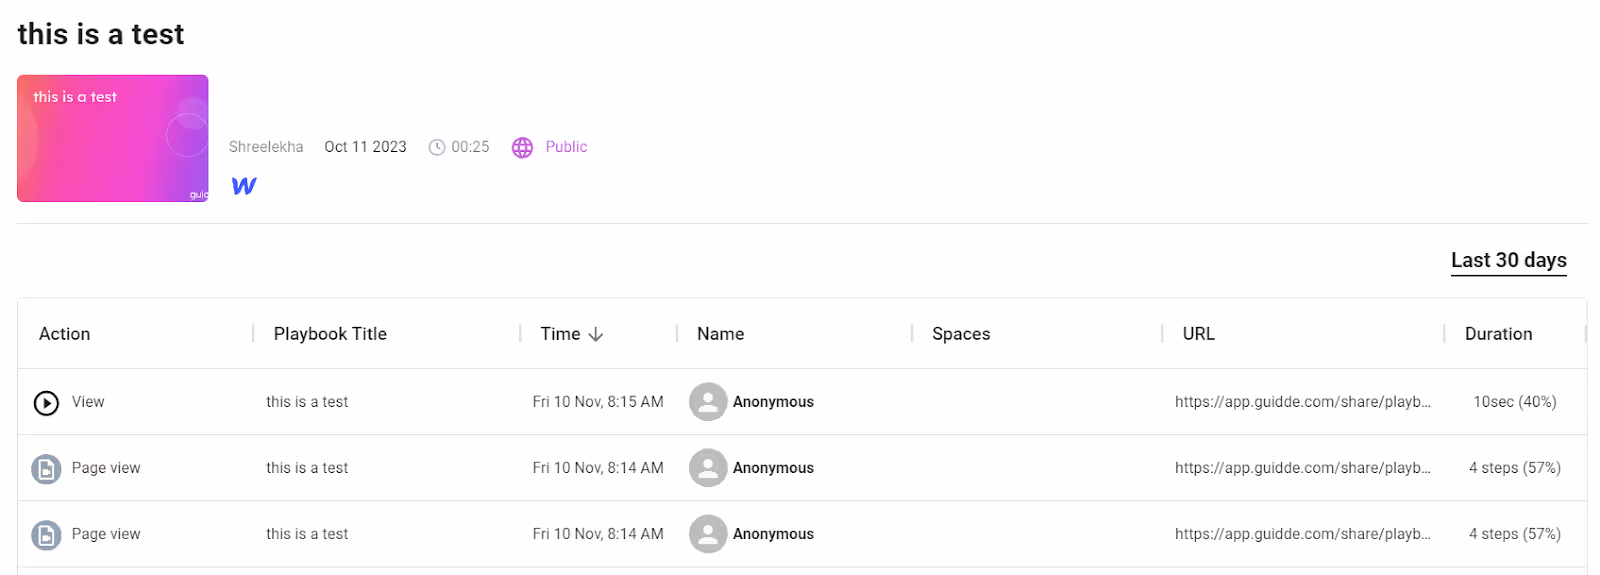
Guidde gives you several data points, like:
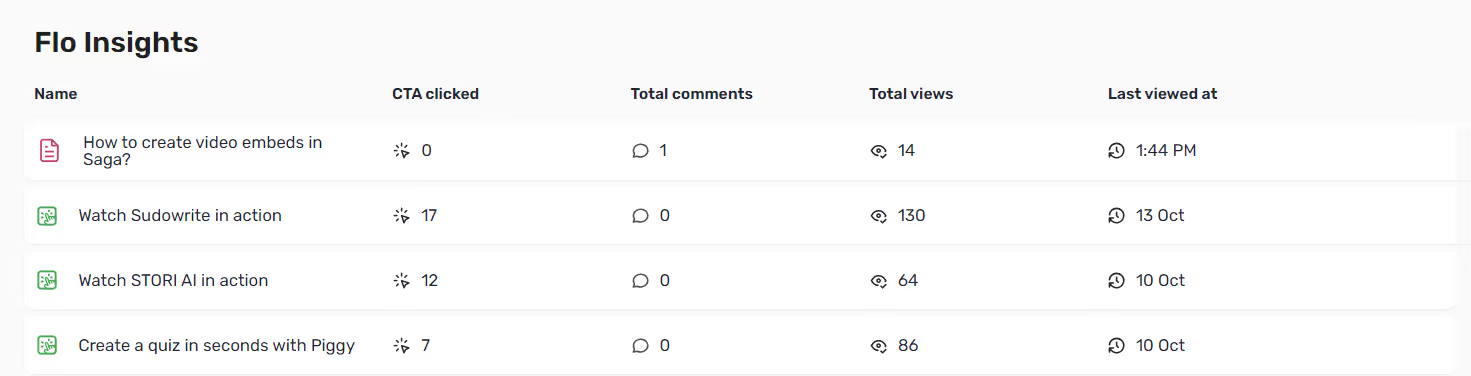
You’ll find similar data in Floik where you can check how many users clicked on the CTA along with total views and comments. All the data is updated in real-time.
SEO is another aspect where all three tools are on level terms. All guides created using Scribe, Guidde, and Floik can be indexed on search engines, if required. While this feature is available for free in Scribe and Guidde, it’s available in the Team plan on Floik. And there’s a reason for that!
Floik’s Team plan lets you set up one custom domain. When you enable SEO on this custom domain, you can automatically attract more targeted traffic that helps your overall website traffic.
Scribe, Guidde, and Floik are all feature-packed tools to create step-by-step guides. But they differ starkly when you look at the fineprint.
This article covered the good, bad, and missing aspects of all three tools to help you make an informed decision. If you want to dig deeper, then sign up for Floik today and see how it works!
Floik helps in creating customized self-serve interactive demos, product videos and step-by-step guides in minutes on a single platform


.avif)
.avif)
.avif)